Why Is My Bread Crust So Thick Hard? 5 Tips For Next Time
Bread baking is a wonderful experience, but it can be frustrating when your loaf comes out of the oven with an overly thick or hard crust. If you've ever wondered why this happens, we're here to help! In this post, we'll explain what causes thick and hard bread crusts and share five essential tips that will help you avoid them in the future so that you can enjoy perfectly soft loaves every time.
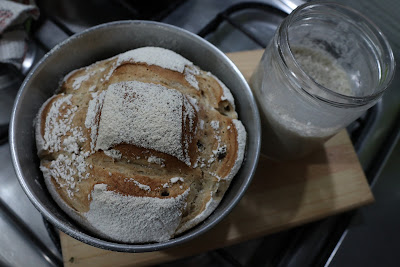
1. Use The Right Amount Of Flour
When preparing your dough for baking, it's important not to use too much flour. Adding excess flour makes the dough dry and toughens its structure; thus resulting in thicker/harder than expected crusts when baked. To prevent this from happening next time around, make sure that you measure your ingredients accurately - including water- as even slight variations could affect how much flour is needed during kneading process.
2. Control Your Oven Temperature And Humidity
The temperature inside of an oven affects how quickly heat penetrates through the dough surface while humidity levels play a significant role in determining whether moisture evaporates more slowly (making things soggy) or faster (causing crusting). That said if either one isn't optimal then chances are high that over-browning occurs leading towards undesired results like tougher-than-necessary exteriors on our freshly baked goods!
To control both factors adequately:
- a) Preheat your oven at least half-hour before cooking begins;
- b) Place boiled water underneath cake pans/dough bowls containing unbaked products within range;
- c) Reduce heat by ten degrees after adding items into preheated ovens
- d) Remove any extra steam sources once they have served their purpose.
3.Choose The Right Baking Pan Or Sheet
The type of pan/sheet used also plays a crucial part since different materials retain varying amounts/levels of heat throughout cooking processes impacting final outcomes greatly.
If using aluminum foil-lined trays/bakeware coated with Teflon-like substances stick-resistant surfaces save yourself some hassle by cutting away excess edges which tend sticking onto finished products.
4.Knead Properly And Rise Accordingly
Kneading develops gluten strands needed for structural integrity besides providing yeast cells enough space & oxygen required growing/multiplying appropriately eventually producing delicious airy interior crumb textures making each bite mouthwatering delight!
On other hand rising times should always be followed according recipe instructions keeping temperature fluctuations under check ensuring adequate fermentation rates without compromising product quality/taste etcetera…
5.Store Properly After Baking
Storing rolls/pieces/fresh-baked goodies correctly prolong shelf life whilst retaining original texture/flavors preferentially wrapping tightly plastic-wraps placed refrigerators/freezers until ready serve/eat later!
In conclusion:
Making perfect homemade bread might seem daunting at first glance but following above steps along practice-persistence determination helps achieve desired goals regularly turning-out well-formed yet tasty batches everyone loves devouring eagerly…so keep practicing till mastery achieved!